Spring Boot | How to build layered jar
In this article, I will show you how you can build a simple CRUD application and create a layered jar. The inventory service manages…
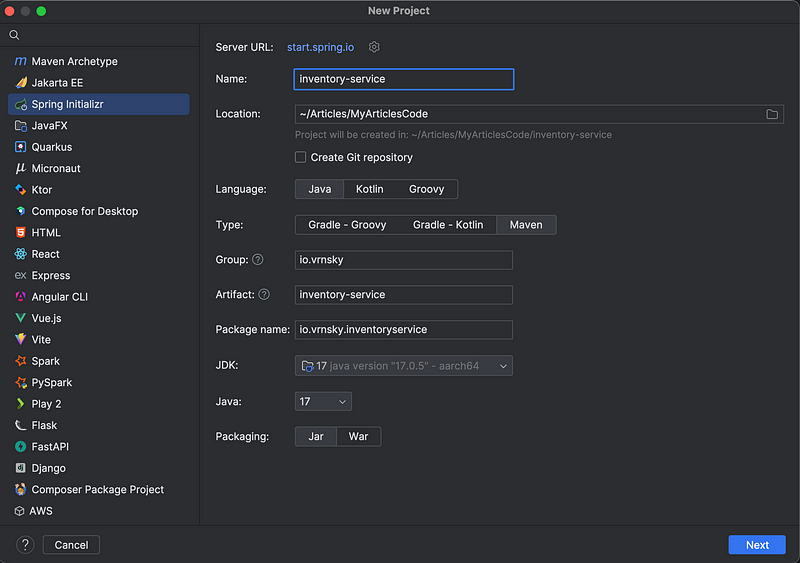
In this article, I will show you how you can build a simple CRUD application and create a layered jar.
The inventory service manages inventory, such as left stocks, i.e., some drinks, merch, or something else that can be stored in the warehouse.
Reasons for choosing layered jar:
- If you have an extensive application with different dependencies
- If you need flexibility in layer updates
Reasons for choosing Uber Jar:
- If you have a simple application with a relatively small number of dependencies
- If you need simplicity in the deployment process
Implementation
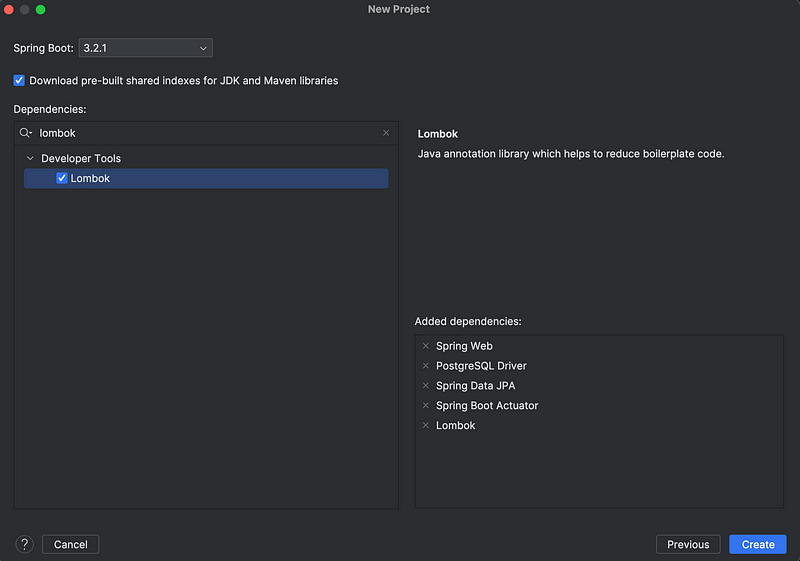
We will start by developing two core services before developing the inventory service
Before developing a controller and services, think about database structure. Let’s draw a simple entity relationship diagram.
What is ERD?
Definition from Wikipedia
An entity–relationship model (or ER model) describes interrelated things of interest in a specific domain of knowledge. A basic ER model is composed of entity types (which classify the things of interest) and specifies relationships that can exist between entities (instances of those entity types).
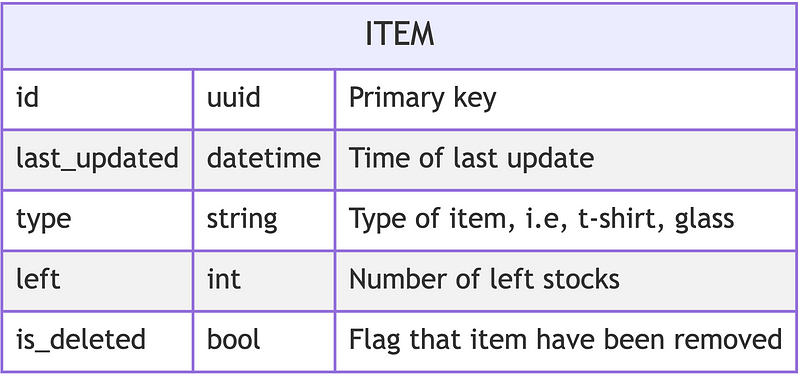
I cannot say that this is an excellent example of ERD since we have only one table in the database for inventory service. But in real applications, the number of tables and relations between them can be relatively high.
You can generate the same ERD on the Mermaid; below is the definition of the ERD diagram.
Since we have defined entities for inventory service, we may start to code something.
The first thing to do is describe the type of items. I will use a plain Java enum to describe the type of item. The second thing is to describe our entity.
package io.vrnsky.inventoryservice.entity;

public enum ItemType {
    MERCH,
    DRINK,
    DISH
}
package io.vrnsky.inventoryservice.entity;
import jakarta.persistence.Column;
import jakarta.persistence.Entity;
import jakarta.persistence.EnumType;
import jakarta.persistence.Enumerated;
import jakarta.persistence.GeneratedValue;
import jakarta.persistence.Id;
import jakarta.persistence.Table;
import lombok.Data;
import java.time.LocalDateTime;
import java.util.UUID;
@Data
@Table(name = "ITEM")
@Entity
public class ItemEntity {
@Id
@GeneratedValue
@Column(name = "ID")
private UUID id;
@Column(name = "LAST_UPDATED")
private LocalDateTime lastUpdated;
@Column(name = "TYPE")
@Enumerated(value = EnumType.STRING)
private ItemType itemType;
@Column(name = "LEFT")
private Integer left;
@Column(name = "IS_DELETED")
private boolean isDeleted;
}Before developing a service, let’s create a data transfer object to separate the entity from it. But you may use something other than this approach, which is up to you. It sounds like copy a copy-and-paste approach, but it is better to separate to have more control over the data your service will send out.
package io.vrnsky.inventoryservice.dto;

import io.vrnsky.inventoryservice.entity.ItemType;

import java.time.LocalDateTime;
import java.util.UUID;

public record Item(
        UUID id,
        LocalDateTime lastUpdated,
        ItemType itemType,
        Integer left,
        boolean isDeleted
) {
}
The enum looks the same as for the entity level.
Before moving on to database migrations, let’s create methods converting entities to dtos and dtos to entities.
public static ItemEntity toItemEntity(Item item) {
        var entity = new ItemEntity();
        entity.setId(item.id());
        entity.setLastUpdated(item.lastUpdated());
        entity.setItemType(convertItemType(item.itemType()));
        entity.setLeft(item.left());
        entity.setDeleted(item.isDeleted());
        return entity;
    }

    public static Item toItem(ItemEntity itemEntity) {
        return new Item(
                itemEntity.getId(),
                itemEntity.getLastUpdated(),
                convertItemType(itemEntity.getItemType()),
                itemEntity.getLeft(),
                itemEntity.isDeleted()
        );
    }

    public static io.vrnsky.inventoryservice.entity.ItemType convertItemType(ItemType itemType) {
        return Arrays.stream(io.vrnsky.inventoryservice.entity.ItemType.values())
                .filter(it -> it.name().equals(itemType.name()))
                .findFirst()
                .orElse(null);
    }

    public static ItemType convertItemType(io.vrnsky.inventoryservice.dto.ItemType itemType) {
        return Arrays.stream(io.vrnsky.inventoryservice.entity.ItemType.values())
                .filter(it -> it.name().equals(itemType.name()))
                .findFirst()
                .orElse(null);
    }
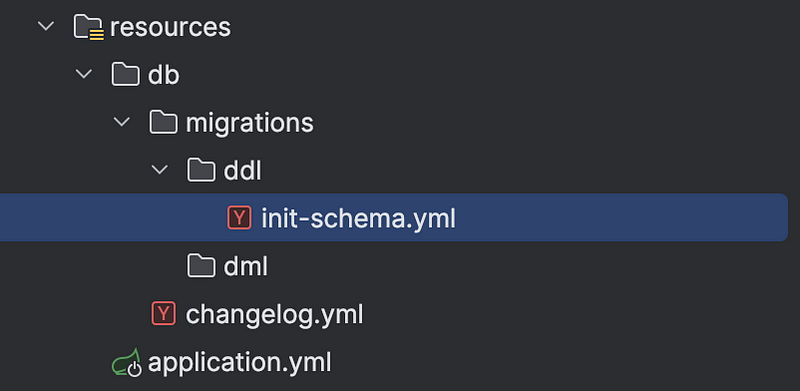
The next thing to do is to create a migration to the init database.
I keep DDL and DML migrations in different folders, so the folder structure is below.
We must add the Liquibase core to our pom.xml to execute the migration automatically. Another thing to test against the actual PostgreSQL instance: the inventory service utilizes TestContainers.
<dependency>
            <groupId>org.liquibase</groupId>
            <artifactId>liquibase-core</artifactId>
        </dependency>
        <dependency>
            <groupId>org.testcontainers</groupId>
            <artifactId>postgresql</artifactId>
            <version>1.18.3</version>
            <scope>test</scope>
        </dependency>
        <dependency>
            <groupId>org.testcontainers</groupId>
            <artifactId>junit-jupiter</artifactId>
            <version>1.18.3</version>
            <scope>test</scope>
        </dependency>
Before running the test, one test case was generated by Spring Boot Initializr. Let’s create a base class for other tests.
package io.vrnsky.inventoryservice;

import org.springframework.boot.test.context.SpringBootTest;
import org.springframework.test.annotation.DirtiesContext;
import org.springframework.test.context.DynamicPropertyRegistry;
import org.springframework.test.context.DynamicPropertySource;
import org.testcontainers.containers.PostgreSQLContainer;
import org.testcontainers.junit.jupiter.Container;
import org.testcontainers.junit.jupiter.Testcontainers;

@Testcontainers
@SpringBootTest(webEnvironment = SpringBootTest.WebEnvironment.RANDOM_PORT)
@DirtiesContext
public class DatabaseIntegrationTest {

    @Container
    public static PostgreSQLContainer<?> postgreSQLContainer = new PostgreSQLContainer<>()
            .withPassword("inmemory")
            .withUsername("inmemory");

    @DynamicPropertySource
    static void postgresqlProperties(DynamicPropertyRegistry registry) {
        registry.add("spring.datasource.url", postgreSQLContainer::getJdbcUrl);
        registry.add("spring.datasource.password", postgreSQLContainer::getPassword);
        registry.add("spring.datasource.username", postgreSQLContainer::getUsername);
        registry.add("spring.datasource.platform", () -> PostgreSQLContainer.NAME);
        registry.add("spring.datasource.hikari.auto-commit", () -> false);
    }
}
Before developing our service, let’s create a simple JPA Repository.
public interface ItemEntityRepository extends JpaRepository<ItemEntity, UUID> {
}
So, to instruct the maven plugin to build a layered jar, we have to configure it.
<build>
        <finalName>inventory-service</finalName>
        <plugins>
            <plugin>
                <groupId>org.springframework.boot</groupId>
                <artifactId>spring-boot-maven-plugin</artifactId>
                <configuration>
                    <layers>
                        <enabled>true</enabled>
                    </layers>
                    <excludes>
                        <exclude>
                            <groupId>org.projectlombok</groupId>
                            <artifactId>lombok</artifactId>
                        </exclude>
                    </excludes>
                </configuration>
            </plugin>
        </plugins>
    </build>
mvn clean packageThe next step is to build a Docker image. Since we have instructed Maven to produce a layered jar, we will separate it in a Docker image so that you will see different folders in the container later. Below is Dockerfile
FROM eclipse-temurin:17 as JAR_EXTRACT
WORKDIR /app
ARG JAR_FILE=*.jar
COPY ./target/${JAR_FILE} ./app.jar
RUN java -Djarmode=layertools -jar ./app.jar extract
FROM eclipse-temurin:17
WORKDIR /application
COPY --from=JAR_EXTRACT /app/dependencies ./
COPY --from=JAR_EXTRACT /app/spring-boot-loader ./
COPY --from=JAR_EXTRACT /app/snapshot-dependencies ./
COPY --from=JAR_EXTRACT /app/application ./
ENTRYPOINT ["java", "org.springframework.boot.loader.launch.JarLauncher"]
EXPOSE 8080
Tools such as Jib and Buildpacks and the f8c Maven plugin exist to build a Docker image. So choose the best suitable for you.
Building in image by command:
docker build -t inventory-service:latest .Try to run the application, but it will fail since the container has no database. Let’s fix this by writing a docker-compose file.
version: "3.8"
services:

  ### Services
  inventory-service:
    image: inventory-service:latest
    container_name: inventory-service
    ports:
      - "8080:8080"
    environment:
      - SPRING_DATASOURCE_URL=jdbc:postgresql://pg:5432/inventory
      - SPRING_DATASOURCE_USERNAME=postgres
      - SPRING_DATASOURCE_PASSWORD=55555
      - SPRING_LIQUIBASE_CHANGELOG=classpath:db/changelog.yml
    depends_on:
      - pg

  ### Database
  pg:
    image: 'postgres:13.1-alpine'
    container_name: pg
    environment:
      - POSTGRES_USER=postgres
      - POSTGRES_PASSWORD=55555
      - POSTGRES_DB=postgres
    volumes:
      - ./init-scripts:/docker-entrypoint-initdb.d
Let’s run and examine the Docker container of the inventory service.
docker compose up -dTo list all running container execute the following command
docker psThe output will look like below.
CONTAINER ID   IMAGE                      COMMAND                  CREATED         STATUS         PORTS                    NAMES
760d1ab34d99   inventory-service:latest   "java org.springfram…"   2 minutes ago   Up 2 minutes   0.0.0.0:8080->8080/tcp   inventory-service
d5b9a2cb714d   postgres:13.1-alpine       "docker-entrypoint.s…"   3 minutes ago   Up 2 minutes   5432/tcp                 pg
Now, we can go inside the inventory service container.
docker exec -it 760d1ab34d99 /bin/bashAfter the terminal changes the prompt to root@…, you are inside the container.
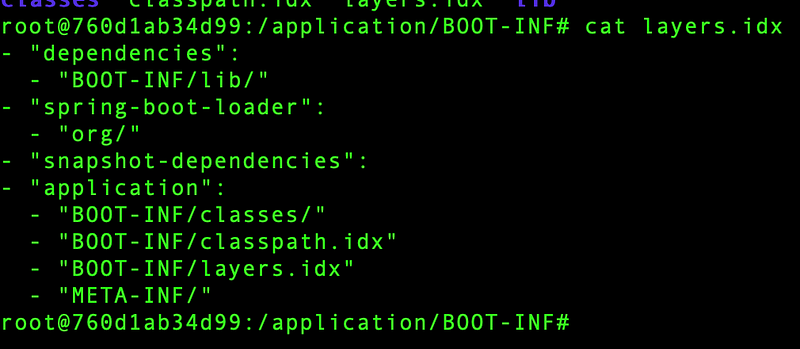
As you may see, we have four layers:
- dependencies
- spring-boot-loader
- snapshot-dependencies
- application
The names of layers give you a clear understanding of what layers are about.